Thursday, February 17, 2011

America's Next Top Model (Home) - Week Five


WEEK FIVE - AREA RUGS AND WINDOW COVERINGS
Now don't panic, but this step can make or break a design. This is a very overlooked but ultra important step in the design process. Think of your windows like large pieces of art and the floors like a sixth wall (ceiling is fifth, in case you're wondering). Integrate these into your design!
Area rugs truly define a space and can also be used to define zones within a space. Centering a smaller area rug in front of the sofa near the television will help visually divide the space as the TV zone. Placing a separate rug in the office zone will define it as such. You get the picture.
Notice how the round rug emphasizes the round table?
So how do you go about choosing the right area rug? It's not as hard as you think. First, ignore the issue of color and thing shape and size. Would an 8 foot round area rug perfectly accent your round dining table? If so, stick to that shape and size when shopping. Do this for all the zones in your space - but keep in mind that not every space needs a rug. The goal is to visually define and unify, not confuse and clutter. Jot down the sizes and shapes you need in your design journal.
How about window coverings? For some reason, window coverings continue to be one of the most daunting design aspects of a room. Make it easy! First, do you even need a window covering? Not every window does. Next, why do you need a window covering? Privacy? Aesthetics? Light control? You don't want to put sheer drapery on your bedroom window where you really need light control. You will hate yourself at 6:00am when the morning sun is burning a hole in your retina. Likewise, you don't want to put purely decorative side panels on a window where you need privacy.
Combine privacy shades with decorative drapes!
Once you have figured out the function of the window coverings, consider the styles available. For light control - do you want black out drapery? Wood blinds? Roman shades? Shutters? There are thousands of books that have pictures and drawings of all different styles of window coverings. Choose the style (not the color just yet) that you like and serves the proper function.

See, it's not so difficult! NOW you can think about color and pattern. We saved this until now, because it is much easier to choose the proper color/pattern/texture when you have already chosen the function and size of the area rugs and window coverings. Also, it is important that these two elements complement each other.
Go back to the pictures you ripped from the design magazines. What do you see about the window coverings and area rugs that would work in your room? Since you've already narrowed down your options based on function, think about the colors and textures you like. Did you find a drapery color/pattern that is perfect? Great! One down. Now take a look at the area rugs next to the fabric you have selected - find one that coordinates. One step at a time...
Quick word about drapery - think custom. Having custom drapery made is NOT as expensive and intimidating as it used to be. By having custom drapery made, you can pick out the fabric and style; you are not limited to the pre-packaged items you find at the store. These will be made just for your and your windows - and often at the same price as the pre-packaged stuff! Even better, typically the drapery person will come out to your house to measure and can even install them! Go ahead, give it a whirl - you'll be glad you did!
After you have selected the window coverings and area rugs, put them where they belong in the room - window covering installed on the windows (not draped over the arm of the sofa) and area rugs properly placed on the ground. This will do two things; first, you will see immediately if you made the right choice (it is easier to change these now than later). Second, you will be able to better evaluate what you need to complete the design. Easy is our goal, right?

Tuesday, February 8, 2011

America's Next Top Model (Home) - Week Four

WEEK FOUR - Add the Basics!
Here is where the fun starts! Adding the basics, exactly what are the basics? This is not the time to think about accent pieces like coffee tables, lamps, small chairs, etc. This step is for the "investment pieces" like installed light fixtures and large pieces of furniture.
Go back to the list you created at week one.  Think about the function of your room and consider the multi-function pieces needed (i.e. the cabinet that doubles as a home office, toy storage for the playroom "zone").  Now is a great time to take out photographs from the design magazines from your journal. What large pieces of furniture will work for your space?
Time to make some big decisions. Look at the furniture you already have. Will it function according to your needs? If not, get rid of it. Put it in another room, sell it (consignment stores really come in handy at this point) or donate it. After you have conducted a survey of what you have that will or won't work, make another list. What do you really need? Write down both the item and it's purpose, for instance, "sofa sleeper so room can double as guest space."
Now that you know what you need, where are you going to shop? You could always shop the expensive furniture stores and buy new pieces, but in this economy? Are you kidding? consider all of your sources. How about friends & family - does someone have an old desk they're not using anymore? How about that perfectly good sofa that is sitting in a neighbor's basement?
Next option is consignment furniture. Now, before you turn up your nose, remember that consignment shopping isn't what they used to be. Gone are the dirty old thrift shops and stuffy antique stores - consignment furniture is now all the rage with a wide variety of furniture styles that you cannot find in retail stores for prices you cannot believe! Inventory changes all the time, so you don't have to wait for the season to change for new items (like you do at most new furniture stores). Consignment furniture offers an inexpensive alternative to get pieces of furniture that are functional as well as stylish and unique - pieces that NOBODY else will have!  Even better, consignment stores can also take your old furniture and sell it for you and most have delivery services. Awesome, right?!
Did you know that the best consignment stores are now offering reupholstering services at reasonable prices? Use that service. They may even have the fabric on site so you can coordinate your fabric with the furniture piece at the same time. Talk about One Stop Shopping! You don't want to pass up the perfect dining set because of the ugly faded dining chair fabric - recover them!
BIG CONCERN - consider the scale of your room. Furniture always looks smaller in a large showroom than it does in your smaller space. Measure your room and take the measurements with you when shopping (include measurements of doors, hallways and stairs!). If you find a piece that is too big (or even too small) just walk away - even if you love it. An out-of-scale piece will only throw off the balance of the room. Be strong!
Quick tip on choosing your large pieces of furniture - THINK ABOUT THE BIG PICTURE.  Look at the pictures you so thoughtfully cut out of design magazines. Carefully consider how much pattern or color you are adding. Is this a statement piece that may be changed in a few years or do you want it to stand the test of time? A statement piece can be amazing, but remember, you want to make a statement, not a speech. Too many large statement pieces make a design confusing and cluttered. Remember you will soon have the opportunity to add smaller statement accessories (patience, little one!).
Last step, placing the furniture. Go back to the diagram/floor plan you created in week one. Where will the items be placed in the room? Remember your function zones. Go ahead and actually place your larger items in the room - don't leave them wrapped up in the garage. Have these important pieces in the space will provide you with valuable visual information to make the next steps infinitely easier...

Tuesday, February 1, 2011

America's Next Top Model (home) - A six week shape up guide to a brand new view!


Week Three - COLOR!

Why is the prospect of choosing colors so terrifying for so many people? Are you worried you're going to pick the wrong color?! The wrong finish?!?!  RELAX - it's just paint. Painting the walls and ceiling is just one of many layers we will add to create your masterpiece. We're here to make it easy for you!

First, take a close look at your room. Are there any fixed items or colors that you can't change? For instance, if you are re-decorating your kitchen and cannot change counter tops, cabinets, or flooring - we will work with those colors and finishes when painting the room.  
Consult your magazine photos again - ignore everything except the color. What colors do you keep coming back to? Do you prefer a monochromatic color scheme or bold, splashy colors? Do clean, fresh colors keep coming back or muted, romantic shades?
Consider the configuration of your room - is it long and narrow? Short and wide? Does it have a feature wall? Do you want to create a feature wall? Remember that dark colors recede and light colors come forward. When in doubt with color, stick to neutrals - that doesn't mean only white or beige! Neutral means a basic palette that can be added to ... red or black could be considered a neutral.
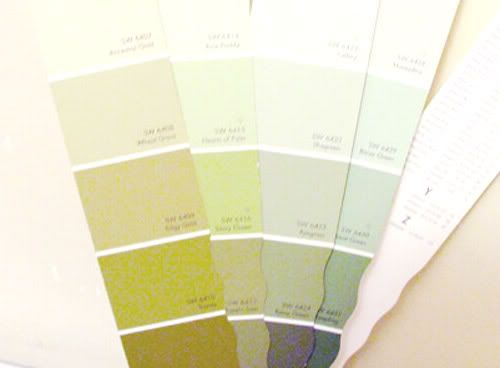
Narrow your choices to one or two color schemes and write these down in your journal. Keeping those colors in mind, time to head to the paint store.  Don't be overwhelmed by the vast array of colors. You already have a general idea of what you like, right? Go through the color(s) you have chosen - no second guessing yourself - and spend 30 seconds grabbing the first six paint chips that attract your attention. Congratulations! You have just narrowed thousands of possible colors into six!
So what if you don't want to paint every wall and the ceiling the same color? No problem! Paint manufacturers do a lot of the work for you. Typically the top 1-2 colors are used for ceiling and trim. Accent walls are typically two up or down from the main wall color. For example, if you choose a dark tone for the main color, then two up is a good accent color. Pretty simple stuff, right?

DO NOT BUY YOUR PAINT THAT DAY!  We recommend buying a sample of each chosen color (at least the shade you think you want for the walls) and bring swatches home of the remaining colors.  Remember - lighting in your home is always different than the store. Keep in mind that colors will look different natural sunlight as opposed to incandescent light at night. 
Paint 12"-24" of wall in each color you've chosen. Also paint a bit next to the existing trim (if you're not changing it). Also paint a bit on the ceiling (color always looks lighter on the ceiling than on the swatch). If you have chosen an accent color, paint it next to the main wall color. If you only have paper swatches - tape them up!  Now you should have a good idea of how these colors will look in your own space. After 24 hours of viewing the paint swatches in different lighting (and also, just getting used to them), it's time to get going and paint the room! 
QUICK TIP:  paint comes in different sheens/finishes. Consult the chart below to determine which will be appropriate for your application.